
Linux: Use a Secondary Cable / DSL Wi-Fi Connection Together with Your Starlink Ethernet Link
Combining two Internet connections may seem like rocket science, but it’s actually quite simple if you have the right channel bonding app like Speedify.
In this guide we'll show you how you can use your Starlink satellite Internet connection via wired Ethernet together with another Wi-Fi network, that can be your old cable / DSL connection, for example.
Speedify can bond your Starlink satellite connection with any number or combination of other Internet connections and will intelligently distribute your online traffic among them for optimal performance.
Quick answer
Should you get a backup connection for Starlink?
Yes. Starlink goes down every day — an always-on dish averages about 34 minutes of downtime daily from routine satellite handoffs. A second connection keeps you online when Starlink drops.
What’s the best backup connection for Starlink?
A 4G/5G cellular hotspot or SIM is the most practical backup for most Starlink users — it works anywhere Starlink works, requires no installation, and uses a different network so outages rarely overlap. Cable or DSL broadband is a strong option if you have it at a fixed location. A second Starlink dish is also possible if you need maximum throughput.
How do you use two internet connections at once with Starlink?
Speedify combines Starlink with any other connection — cellular, cable, Wi-Fi, or a second dish — into one bonded connection. Speedify runs on your phone, laptop, or router. When Starlink drops, Speedify moves your traffic to the backup instantly, so calls don’t cut out and downloads don’t stall. Speedify is free to try.
71% of Speedify’s Starlink users already run a second connection. Try Speedify free →
Speedify Starlink Index — real-world performance from 6,209 Starlink users: 2.4% downtime, about 34 minutes a day for always-on connections
Starlink goes down every day.
Here’s what that actually looks like.
Speedify passively monitors every connection it bonds. These figures come from 6,209 Starlink users over 14 days — compared in real time against the other connections on the same devices. No speed tests, no lab conditions.
Daily downtime
~34 min
2.4% of connected time unreachable
Median latency
60 ms
p90 spikes to 257 ms
Avg packet loss
0.17%
vs 0.08% on T-Mobile
71% ran at least one other connection simultaneously — 4,381 of 6,209 users. Cellular is the most common backup.
Use Speedify to stay online during satellite handoffs every 15 seconds
Research confirms Starlink switches between satellites every 15 seconds on a fixed schedule. Each satellite handoff is a potential dropout, and on a congested network or with any obstruction, those Starlink dropouts become real interruptions.
Speedify fixes Starlink connection drops by combining your Starlink internet connection with another satellite dish, Wi-Fi, 4G/5G cellular, or wired Ethernet at the same time. When Starlink drops, Speedify keeps your traffic moving on the backup internet connection instantly.

Speedify alerts you about your Starlink dish status
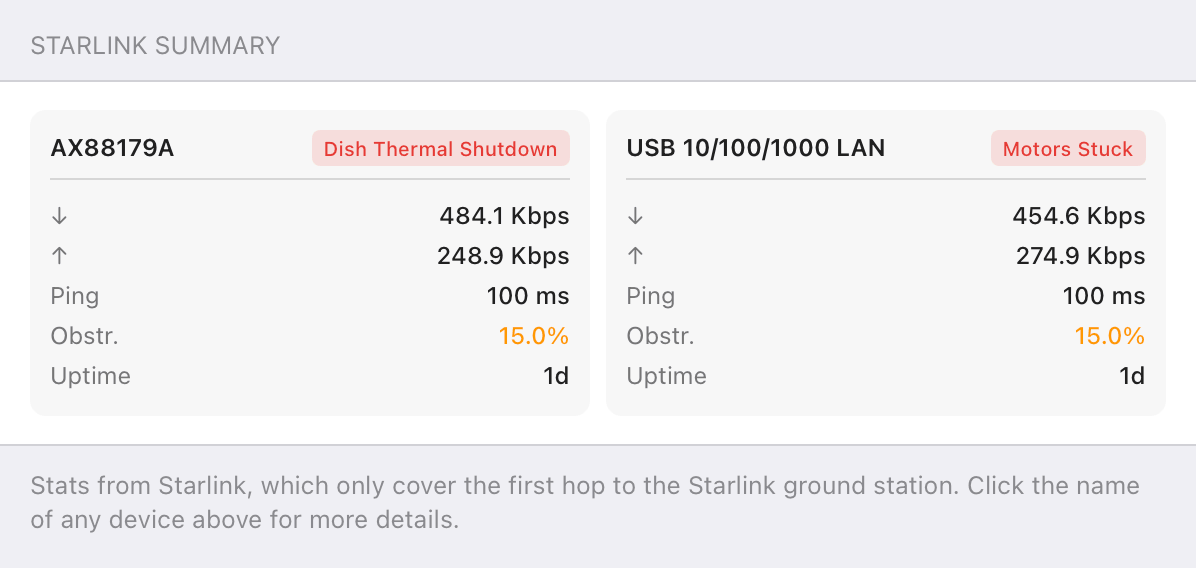
Speedify software alerts you about your Starlink dish status as soon as your dish experiences an issue - e.g. when your actuator motor is stuck, the mast is not vertical or there's a thermal throttle.
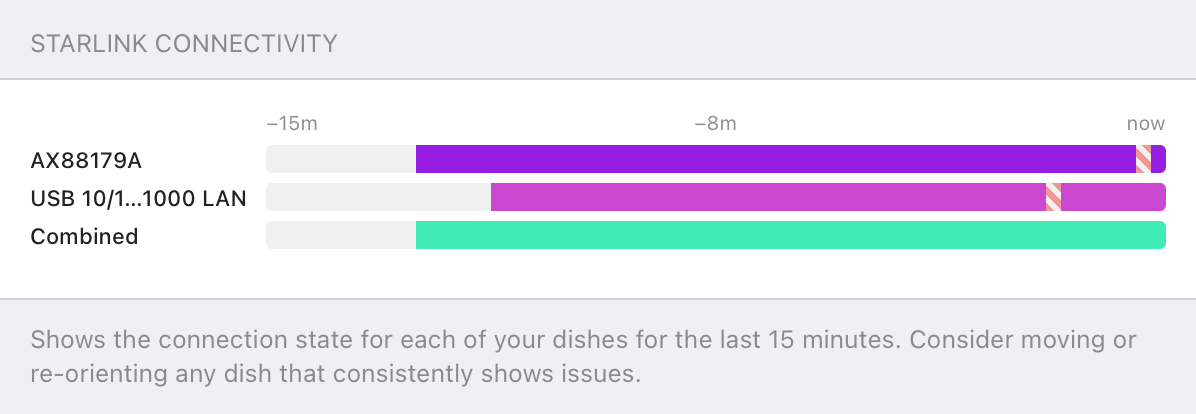
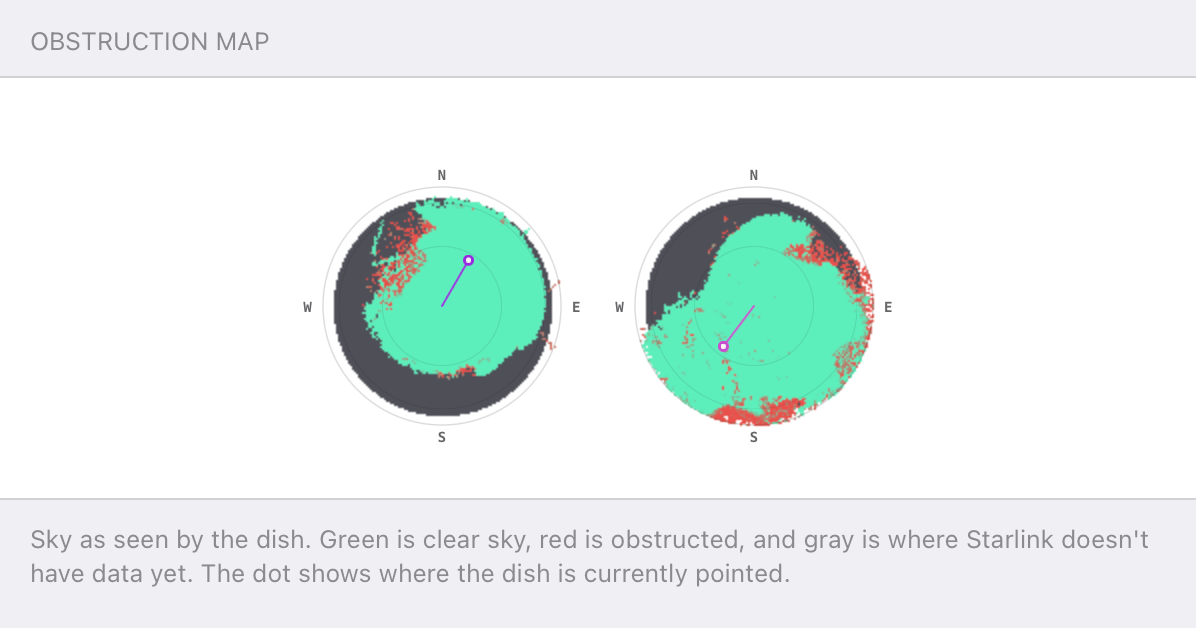
Speedify's Starlink Control Center helps you monitor all your Starlink dishes, read obstruction maps, and align multiple dishes all in the Speedify app. Get a real-time view of each dish's health and optimize the position of each Starlink dish, so you get the best possible performance out of your Starlink connections.
Speedify Feature
Cellular sharing that goes both ways.
Explore Speedify's Pair & Share Feature
⌄
Speedify Feature
Cellular sharing that goes both ways.

Speedify Feature · Pair & Share
Speedify Pair & Share: share cellular between your devices, both ways
Most hotspots give. Speedify's Pair & Share gives and takes. Two devices running Speedify pair up and each uses the other's cellular connection simultaneously, so you both get faster uploads, faster downloads, and a steadier connection. No extra hardware, no new data plans, no setup beyond a tap.
Learn how Speedify's Pair & Share works ›More speed
Every device you pair with adds its cellular to yours, and yours to theirs.
Stays connected
If a paired device drops out, Speedify keeps you online on the remaining links.
Always private
Every shared connection runs through AES-256 encryption. Your traffic is yours.
No new gear
Runs on devices already running Speedify, over your local network. Pair once, reconnects automatically.

3 Steps to Combine Starlink via Wired Ethernet with Cable / DSL via Wi-Fi on Ubuntu Linux
Step 1: Connect to Your Starlink Internet via Wired Ethernet
As of January 2023, Starlink comes in the box with the Wi-Fi router only. But you can get a Starlink Ethernet adapter you mount between the dish and the Wi-Fi router. This will provide a wired Ethernet port you can input into your Linux computer.
Connect an Ethernet cable between your router or modem and the Ethernet port on your Ubuntu computer. If your computer doesn’t have a built-in Ethernet port, try using a USB to Ethernet adapter instead. Ubuntu will start using your Ethernet connection and you should see it listed in the System Menu under “Wired Connection”.
Step 2: Connect to Your Cable or DSL Internet via Wi-Fi
Click on the arrow in the top right corner (also known as the System Menu) then Wi-Fi > Select Network and choose your desired network. Keep in mind, private networks may require you to enter a password before connecting.
Step 3: Download and Install Speedify
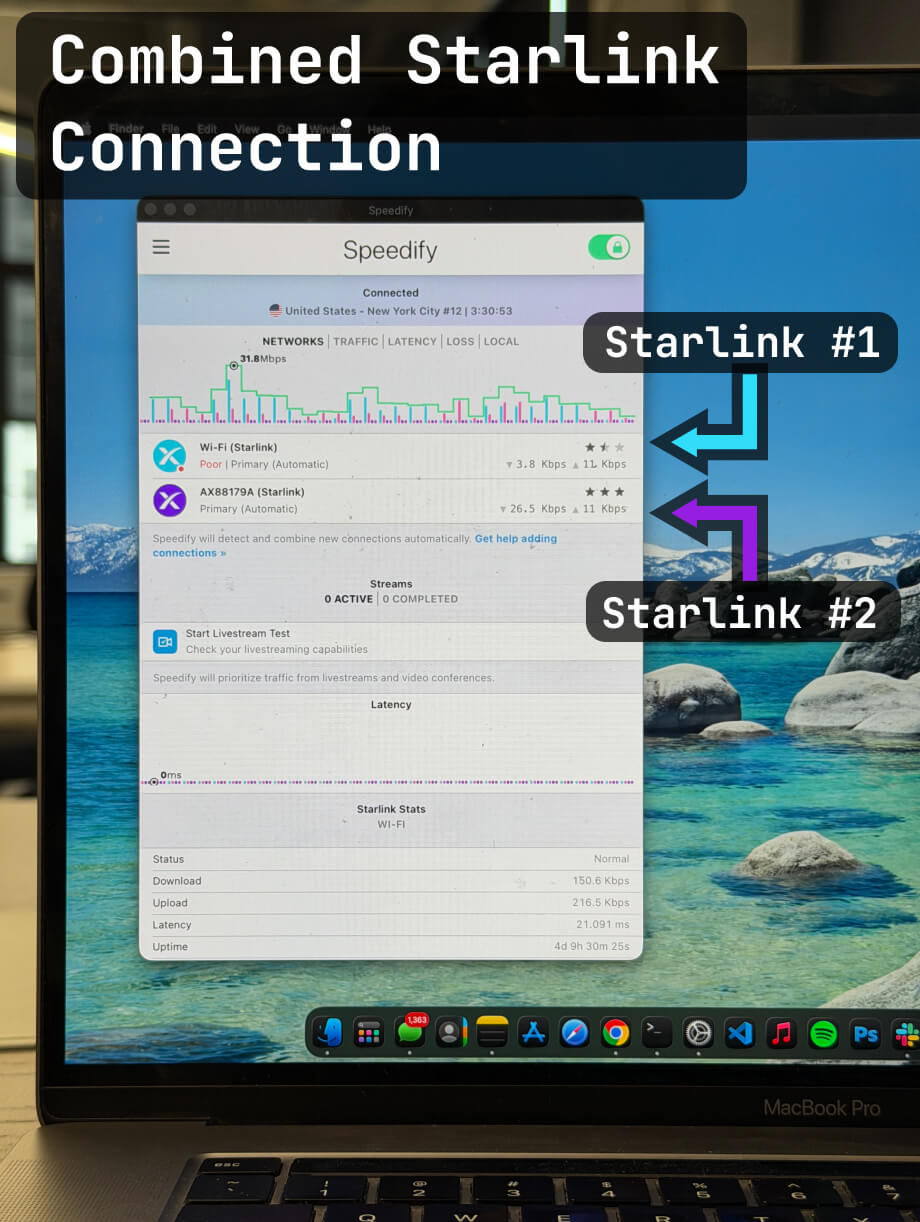
Last but certainly not least, download and install Speedify. Once running, Speedify will automatically detect any available Internet connections and combine them for increased speed, security, and stability. This means you should see both your Starlink wired Ethernet connection as well as your cable / DSL Wi-Fi connection in the app's user interface.
You can manage settings, view statistics, and even apply limits to individual connections by either clicking/tapping on them from the Dashboard or by navigating to the desired connection through the main Settings menu.
Speedify will work quietly in the background to optimize performance including prioritizing streaming web traffic to avoid stuttering, buffering and disconnects.
Whether at home, work, or on-the-go, Speedify is the only VPN that makes your online experiences faster, more reliable, and more secure.

Get started with Speedify today!
With Speedify you can combine Wi-Fi, 4G / 5G cellular, Ethernet, Starlink and other satellites into one bonded super-connection to improve livestreaming, video calling, gaming, web browsing, and everything else you do online.


Speed
Stability
Security
Speedify engineers love talking tech on YouTube, Tiktok, and Instagram!
Alex Gizis and the Speedify engineers discuss and explain technology including Starlink satellites, Wi-Fi 7 routers, Apple networking features, fiber optics, broadband internet, 5G mobile networks, AI, networking protocols, and much more. Follow Speedify on YouTube, TikTok, Instagram, and LinkedIn!
Alex and the Speedify team are always exploring the latest in networking and security technology—like 5G, 6G, WiFi 7, laser and satellite internet—and sharing it in new discussion content across YouTube, TikTok, Instagram, and LinkedIn every week.
Got a tech question? Let's go deeper! Pop into Speedify Office Hours live every Wednesday at 10 AM Eastern. Speedify CEO Alex Gizis and our network engineers are standing by to break down your questions about networks, tech updates, and Speedify features.