
Increase Bandwidth and Lower Latency by Using 2 Wi-Fi Networks Simultaneously on Mac
Combining two Wi-Fi Internet connections may seem like rocket science, but it’s actually quite simple if you have the right channel bonding (or link aggregation) software app like Speedify.
In this guide we’ll show you how you can use your Mac’s internal Wi-Fi adapter and a USB Wi-Fi adapter to connect to two different Wi-Fi networks and then use Speedify to combine them.
This article applies to all Mac computers running MacOS Big Sur (version 11) or older. Starting from MacOS Monterey (version 12), Apple removed the support for external USB Wi-Fi adapters.
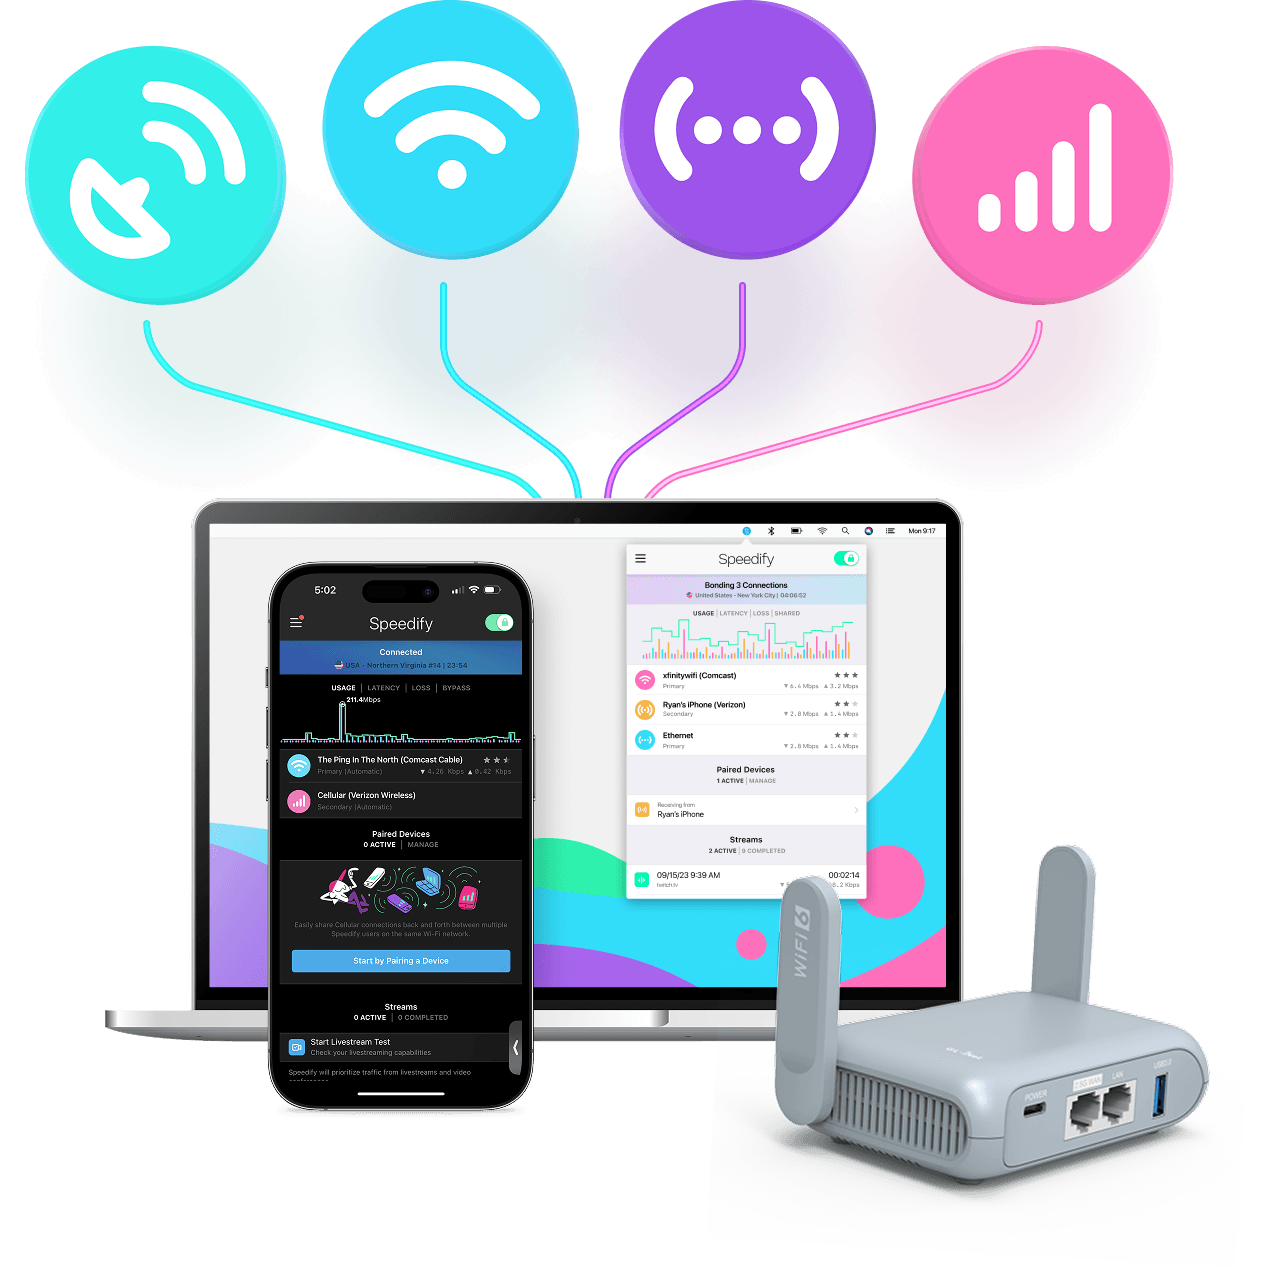
Speedify is the only app available for all major platforms - Windows, MacOS, Linux, iOS, Android and OpenWrt - that combines your Wi-Fi, 4G / 5G cellular, wired, and even your friend’s phone signals – and turns them into one ultra-fast and super secure link that keeps you all connected for the best possible live streaming, video calling, or just posting to your favorite app.
Speedify can bond any number or combination of Internet connections and will intelligently distribute your online traffic among them for optimal performance. Plus, if you get disconnected from one of your connections in the middle of an important video call or file transfer, Speedify will seamlessly failover to your other working Internet connection(s) without skipping a beat.
NOTE: For best results, use Internet connections from different sources. In general, joining the same upstream network multiple times (such as the same router via Ethernet and Wi-Fi) will not improve performance.
Should you have a backup 4G, 5G, Starlink, or cable internet connection?
Yes — every internet connection goes down, including Starlink, which drops for ~34 minutes a day on average. A backup connection from a different provider means one outage never takes you fully offline. The most common options are a 4G/5G cellular hotspot, a cable or DSL line, or a second satellite dish.
4G/5G cellular
Works anywhere. Just a SIM or hotspot — no installation needed.
Learn more →Cable / DSL
Best for fixed locations. Different network, so outages rarely overlap.
Learn more →Second Starlink
Adds redundancy and throughput for remote sites or heavy usage.
Learn more →Speedify bonds any two connections into one — automatic failover, more speed, no dropped calls.
Try free →Speedify Feature · Pair & Share
Cellular sharing that works better than a mobile hotspot.

Speedify Feature · Pair & Share
Speedify Pair & Share: share cellular between your devices, both ways
Most hotspots give. Speedify's Pair & Share gives and takes. Two devices running Speedify pair up and each uses the other's cellular connection simultaneously, so you both get faster uploads, faster downloads, and a steadier connection. No extra hardware, no new data plans, no setup beyond a tap.
Learn how Speedify's Pair & Share works ›More speed
Every device you pair with adds its cellular to yours, and yours to theirs.
Stays connected
If a paired device drops out, Speedify keeps you online on the remaining links.
Always private
Every shared connection runs through AES-256 encryption. Your traffic is yours.
No new gear
Runs on devices already running Speedify, over your local network. Pair once, reconnects automatically.

3 Steps to Combine Two Wi-Fi Connections on a Mac Using Speedify
Step 1: Connect to a Wi-Fi Network
Click the Wi-Fi icon in the menu bar. (If Wi-Fi is off, choose "Turn Wi-Fi on.") Select a nearby Wi-Fi network from the list. Keep in mind, private networks may require you to enter a password before connecting.
Step 2: Configure and Connect your USB Wi-Fi Adapter
You can use a secondary Wi-Fi connection on your Mac computer if it's running MacOS version 11 (Big Sur) or older. You’ll need a compatible USB Wi-Fi adapter and any corresponding software or drivers from the device manufacturer. Instructions may vary for your specific make or model.
Connect your USB Wi-Fi Adapter to a USB port on your Mac. Install the necessary drivers and Wireless Utility for your USB Wi-Fi network adapter. Once complete, you may be required to restart your Mac.
Turn On the Wireless Utility of your USB Wi-Fi Network Adapter.
Next, open the Wireless Utility and select and connect to a network from the list that appears. Be aware that you usually have to enter a password for private networks.
You should now be connected to a Wi-Fi network via your USB Wi-Fi Adapter. To confirm your connection status, visit System Preferences, click Network, and look for your new adapter in the list on the left.
Step 3: Download and Install Speedify
Last but certainly not least, download and install Speedify. Once running, Speedify will automatically detect any available Internet connections and combine them for increased speed, security, and stability.
Need to keep several devices connected in areas with limited or spotty network coverage, like event venues, remote locations or when traveling? Get consistent and uninterrupted online activity for all your devices using Speedify's Pair & Share functionality, which allows you to share cellular data between multiple devices wirelessly.
By pairing devices, you can effectively distribute your cellular connection across them, improving overall performance, especially when other network options like Wi-Fi may be slow or unstable.
You can manage settings, view statistics, and even apply limits to individual connections by either clicking/tapping on them from the Dashboard or by navigating to the desired connection through the main Settings menu.
Speedify will work quietly in the background to optimize performance including prioritizing streaming web traffic to avoid stuttering, buffering and disconnects.
Whether at home, work, or on-the-go, Speedify is the only VPN that makes your online experiences faster, more reliable, and more secure.
Get started with Speedify today!
With Speedify you can combine Wi-Fi, 4G / 5G cellular, Ethernet, Starlink and other satellites into one bonded super-connection to improve livestreaming, video calling, gaming, web browsing, and everything else you do online.

Speed
Stability
Security
Speedify engineers love talking tech on YouTube, Tiktok, and Instagram!
Alex Gizis and the Speedify engineers discuss and explain technology including Starlink satellites, Wi-Fi 7 routers, Apple networking features, fiber optics, broadband internet, 5G mobile networks, AI, networking protocols, and much more. Follow Speedify on YouTube, TikTok, Instagram, and LinkedIn!
Alex and the Speedify team are always exploring the latest in networking and security technology—like 5G, 6G, WiFi 7, laser and satellite internet—and sharing it in new discussion content across YouTube, TikTok, Instagram, and LinkedIn every week.
Got a tech question? Let's go deeper! Pop into Speedify Office Hours live every Wednesday at 10 AM Eastern. Speedify CEO Alex Gizis and our network engineers are standing by to break down your questions about networks, tech updates, and Speedify features.